
A hinged shower screen can make a bathroom feel open while keeping water where it belongs. Its clear glass, neat edges, and swinging door may look simple, but the right choice depends on more than appearance. Measure the shower opening carefully, including any uneven walls or raised thresholds. A difference of a few millimetres can affect how the door closes. Small details matter.
This guide explores ten practical points to consider when choosing a Hinged Shower Screen, from glass thickness and frame style to door clearance and installation. Think about how the bathroom is used each day. A door that swings into a towel rail or vanity can become annoying, even if it looked perfect in a showroom. Check the manufacturer’s fitting instructions, safety-glass specifications, and care recommendations before buying. These details vary between products, so avoid relying on a photograph alone.
Maintenance deserves honest attention, too. Clear glass can show water marks, especially in hard-water areas. A protective coating may reduce buildup, but it does not remove the need for regular cleaning. Nothing stays spotless by itself. Consider who will use the shower, how much space the door needs, and whether professional installation is appropriate for your walls and fittings. It is easy to focus on style first; I would reconsider that instinct. A screen that fits well and opens smoothly is often the more satisfying choice over time.
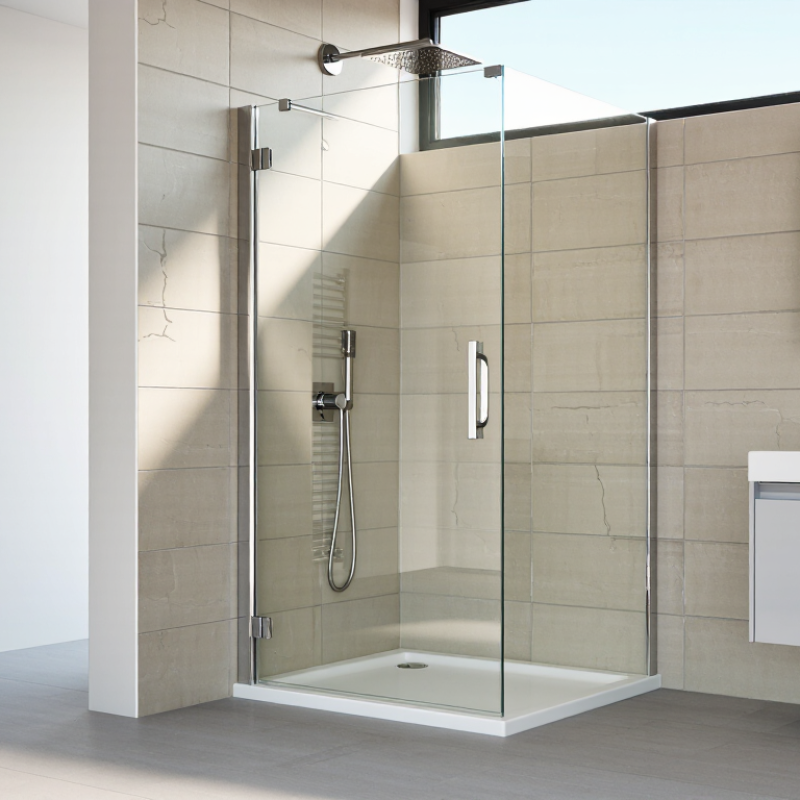
A hinged shower screen uses side-mounted hinges to let a glass door swing open, much like a room door. Its simplicity makes it easy to enter and clean, but it needs clear space for the swing. Measure the door’s full arc, not just the opening. A towel rail, vanity corner, or toilet can get in the way. Measure twice.
The main types suit different layouts. A single hinged panel works for a recessed shower, where walls enclose three sides. An inline screen pairs a hinged door with a fixed glass panel, creating a wider opening while keeping water contained. Corner enclosures usually combine fixed panels with a hinged door; check that the door does not strike nearby fixtures. A bath screen is a smaller hinged panel fitted above a tub, often swinging inward or outward depending on its design.
Hinge position and wall condition matter as much as appearance. Uneven walls can leave gaps, so installers may need adjustable profiles or careful alignment. Check the glass thickness, seals, and floor or tray level before choosing. A screen can look spacious in a showroom drawing, yet feel awkward in a compact bathroom. There is no perfect type for every room; a little clearance on paper can disappear once handles and towels are in place.
Measure the bathroom before choosing a hinged shower screen. Note the distance from the shower opening to the toilet, vanity, towel rail, and opposite wall. A door needs room to swing without hitting anything. Mark its arc on the floor with masking tape, then open the bathroom door too. Small overlaps can matter.
Check the room from several angles. A screen that clears the vanity when fully open may still feel awkward near a narrow walkway. Leave enough space to step in and out comfortably, especially if someone needs support or carries toiletries. Measure the opening at the top and bottom; older walls are not always perfectly square. That can complicate fitting. It is easy to miss.
Think about the layout, not just the measurements. A door that opens outward may suit a compact shower, but only if the surrounding floor stays clear. An inward-opening option can help in a tight bathroom, though it may reduce usable shower space. Consider where water could drip when the door opens, and whether a bath mat would sit in the swing path. I once overlooked the towel rail in a quick sketch. A simple floor plan, with the door arc drawn in, can reveal these small conflicts before installation. If the measurements seem close, recheck them rather than assuming the screen will fit.
10 Tips for Choosing the Best Hinged Shower Screen
Choosing Glass, Frame, Hardware, and Opening Direction
Glass sets the tone and the safety baseline. In the United States, shower-door glazing is covered by CPSC safety standard 16 CFR Part 1201, which specifies impact-performance requirements. Ask the installer to confirm that the glass meets the applicable safety standard; a polished edge alone proves nothing. Tempered glass is common, while laminated options hold fragments together if cracked. Still, neither choice makes a door unbreakable. Clear glass keeps a small bathroom feeling open, but it shows water spots quickly. Frosted glass offers more privacy, with a softer view of the tile.
Frame style affects both appearance and upkeep. Frameless screens have fewer visible metal lines, but they depend on suitable walls, hinges, and careful installation. A framed screen can provide firmer support and cover small edge gaps. Check the finish on every metal part, including screws and hinge pins, since damp corners expose weak coatings first. The National Kitchen & Bath Association’s planning guidance recommends a shower entry of at least 24 inches. Measure the usable opening, not just the door panel. That detail is easy to miss.
Hardware must suit the glass weight and wall construction. Have a qualified installer verify the hinge fixings, especially on tiled or hollow walls. Then test the opening direction with tape on the floor. Does the door hit a vanity, towel rail, or toilet? A screen that opens outward may need clear floor space; inward opening can complicate entry. Check both paths. Real bathrooms are rarely as empty as drawings suggest.
Before comparing styles, verify the glass is safety-rated for shower use and has traceable product documentation. Requirements differ by location, so check the standards that apply where you live. Look for clearly marked tempered glass and inspect every panel for chips or damaged edges. Even a small flaw can become a safety concern after installation. Small details matter.
A hinged screen needs solid support, not just neat-looking tile. Check that the wall is plumb and that fixings can reach a suitable backing or masonry. Hinges should open smoothly without scraping the tray, nearby fittings, or floor. If the wall bows slightly, forcing the glass into alignment can strain the hardware. I have seen this detail overlooked; it is worth checking before drilling.
Waterproofing depends on the whole shower area, not a bead of silicone alone. Confirm that the tray or floor falls toward the drain and that the wall membrane continues behind the finished surface. Fit seals according to the screen instructions, leaving drainage gaps where specified. After installation, run water along the hinges and lower edge, then check the adjoining room for moisture. Sealant needs time to cure. Don’t rush that step. Recheck the joints after regular use, since seals can loosen or wear.
| Tip | What to Check | Why It Matters |
|---|---|---|
| 1. Confirm the safety-glass requirements | Check that the glass is marked or documented as safety glazing and complies with the requirements applicable in your location. Requirements and test standards vary by jurisdiction. | Shower screens are in areas where people may slip or collide with glass. Suitable safety glazing is designed to reduce injury risk if it breaks. |
| 2. Ask for product documentation | Request the glass specification, installation instructions, care guidance, and any applicable conformity or test documents. | Documentation helps confirm that the screen is suitable for the intended use and can be installed and maintained correctly. |
| 3. Measure the opening carefully | Measure the width at several heights and check whether the walls are plumb and the floor or curb is level. Follow the screen’s measuring instructions. | Bathrooms are not always perfectly square. Accurate measurements help avoid poor alignment, fitting problems, and excessive gaps. |
| 4. Check hinge support and wall structure | Confirm that the hinges can be fixed to a suitable, sound structure, using the fixing method specified for the wall type. Do not rely on tile alone for support. | A hinged panel places load on its hinges and fixings. Secure support helps prevent movement or loosening over time. |
| 5. Plan the door swing | Check that the door can open without hitting a toilet, vanity, towel rail, or other obstruction, and that the swing direction suits the bathroom layout. | Adequate clearance makes the screen easier to use and reduces the chance of impact damage. |
| 6. Review the hinge and handle details | Look for corrosion-resistant materials suited to a wet bathroom, smooth hinge movement, secure hardware, and a handle positioned for comfortable use. | Quality, compatible hardware supports reliable operation in a humid environment and makes the door easier to handle. |
| 7. Understand the waterproofing system | Check that the shower base or tiled floor, wall junctions, and drain are properly waterproofed according to local requirements and the system instructions. | A shower screen is not a substitute for a waterproofed shower area. The underlying waterproofing is what helps protect the building from water damage. |
| 8. Check seals, gaps, and water direction | Review the supplied seals and bottom sweep, if included, and follow the installation instructions for gaps and sealant. Make sure the shower layout directs water toward the drain. | Seals can help limit splashing, but no hinged screen is completely leakproof. Correct positioning and water flow are important for containing spray. |
| 9. Use the specified installation method | Follow the manufacturer’s instructions for clearances, fixings, hinge adjustment, and sealant curing time. Use a qualified installer if the work is beyond your experience. | Incorrect installation can affect alignment, door operation, stability, and water containment. |
| 10. Check maintenance and safe use | Choose a screen with clear cleaning guidance. Inspect hinges, fixings, seals, and glass regularly, and avoid slamming or hanging items from the door. | Routine care can help identify wear or loose hardware early and preserve the screen’s safe operation. |
A hinged shower screen can look simple, but its upkeep and long-term cost depend on the room and its hardware. Check whether the door swings freely without hitting a vanity, towel rail, or toilet. Measure the opening carefully; uneven walls may require professional adjustment. Clear tempered glass is easy to inspect, while water spots show quickly on its surface. A soft cloth and mild cleaner usually handle routine cleaning. Avoid abrasive pads, which can scratch glass or damage finishes.
Tips: Compare hinge materials, replaceable seals, and warranty terms before buying. Wipe the lower glass after showers to reduce mineral buildup. Check hinges every few months for looseness, and follow the installer’s care instructions. Small maintenance jobs matter.
Durability affects overall cost more than the purchase price alone. Strong hinges and well-fitted seals can reduce leaks and prevent repeated adjustments. Ask whether parts such as seals and handles can be replaced separately. That may extend the screen’s useful life. Installation also changes the budget: a plumb, solid wall is simpler than a tiled wall with uneven edges. Still, even a carefully chosen screen may need occasional hinge tightening. I once underestimated how quickly hard-water marks appeared; cleaning took more effort than expected. Compare the estimated purchase, installation, cleaning, and repair costs over several years, not just the sticker price.
Compare screen styles before choosing: fewer frames and channels can make cleaning easier, while a more substantial frame may offer added support. Ratings are qualitative guidance on a 1–5 scale, not laboratory measurements; actual performance and price depend on glass, hardware, installation, and care.
476 Main Street - Route 28
Dennisport, MA 02639
Share On: