Blog

Storm Window Repair 7 Easy Tips

Storm window repair deserves more attention than a quick internet fix. A loose frame, cracked glazing, or blocked weep hole can turn a small draft into moisture damage. The U.S. Department of Energy reports that low-emissivity storm windows may reduce annual heating and cooling costs by 12% to 33%. That figure depends on climate, window condition, installation quality, and household behavior.

Historic-window specialist John Leeke offers a useful repair principle: “Repair first; replace only when repair is not practical.” His advice fits older homes, where original wood frames may still perform well after careful maintenance. However, repair is not automatically the cheapest choice. A badly warped sash, hidden rot, or unsafe glass may require professional assessment. Sometimes, I admit, a simple-looking project becomes more complicated after removing the trim.

This guide presents seven practical storm window repair tips for homeowners. You will learn how to inspect damaged seals, clean drainage paths, stabilize loose frames, and improve weather resistance without guessing. Use a soft brush, glazing tools, compatible sealant, and properly rated replacement materials. Do not force brittle glass or work near elevated windows without suitable protection. The National Fenestration Rating Council also emphasizes comparing product performance ratings, not relying only on appearance. Small details matter. A one-millimeter gap can invite wind-driven rain. A blocked weep channel can trap water behind the frame. Careful observation, documented measurements, and realistic expectations make storm window repair safer and more reliable.
Storm Window Repair 7 Easy Tips

Assess the Storm Window Damage and Choose the Right Repair

Storm Window Repair: 7 Easy Tips

Assess the Storm Window Damage and Choose the Right Repair

Before reaching for tools, inspect the storm window in daylight. Wear cut-resistant gloves around cracked glass and sharp aluminum edges. Check the pane, frame, glazing strip, corners, fasteners, and drainage holes. A cloudy pane may indicate failed seals, not surface dirt. Press the frame gently; movement can reveal loose clips or hidden corrosion. Do not force a stuck panel. That mistake can turn a small repair into a replacement.

Match the repair to the damage. Replace a cracked glass insert when cracks cross the viewing area or reach an edge. Reattach a loose screen with new spline only if the frame remains square. Tighten missing fasteners carefully, but stop if threads spin in soft metal.

Small gaps may accept fresh exterior-grade sealant after old material is removed and surfaces are dry. Avoid sealing drainage holes. They carry condensation outside.

Measure twice, including width, height, and frame depth. Write each measurement down. A slightly oversized replacement panel may bind during temperature changes.

For older windows, ask a glass professional to confirm safe sizing. Experience matters here. I once underestimated a warped corner and wasted an afternoon adjusting hardware. Recheck the opening before ordering parts, then choose between adjustment, component replacement, or a full panel replacement.

Gather Essential Tools and Prepare a Safe Work Area

Storm Window Repair 7 Easy Tips

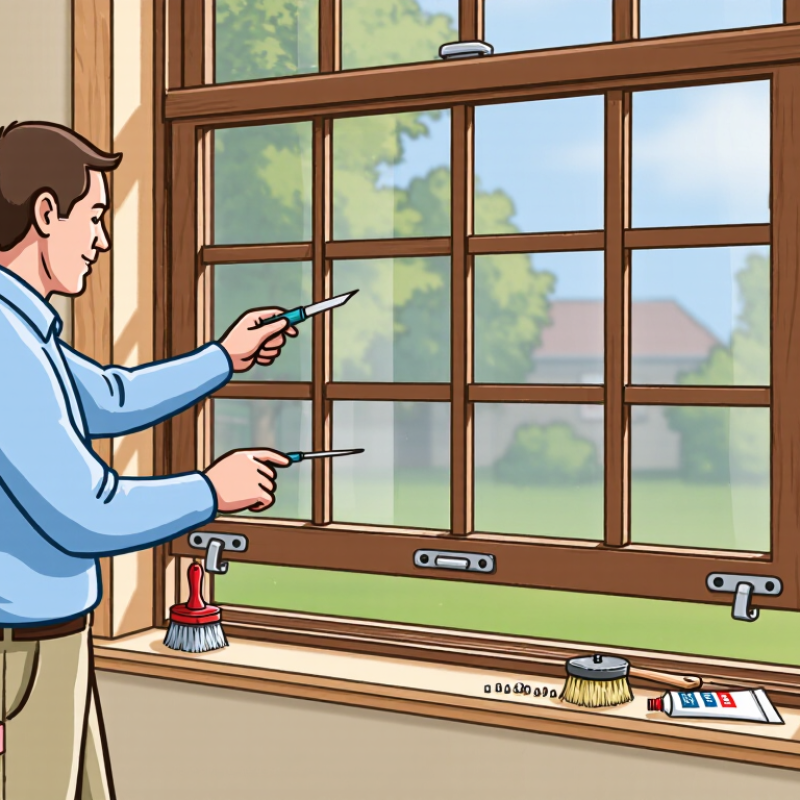
Gather the right tools before removing a storm window. You will need a flat screwdriver, a measuring tape, a soft brush, replacement clips, and exterior-grade sealant. Keep safety glasses and cut-resistant gloves nearby. Small metal edges can be sharper than they appear. A drop cloth beneath the window catches loose screws, dust, and broken fragments.

Prepare a stable work area before touching the frame. Move furniture away, protect the floor, and keep children and pets outside the work zone. Work during dry, mild weather. Moisture can make the frame slippery and weaken fresh sealant. If you use a step ladder, place it on level ground and keep both hands available whenever possible. Do not lean sideways. Climb down and reposition it instead.

Inspect the window before repair. Check the glass, frame corners, fasteners, and drainage openings. Take a quick photo before disassembly; it can prevent confusion during reinstallation. Older painted frames may contain hazardous coatings, so avoid sanding or scraping unknown surfaces. A professional assessment is safer when paint is peeling heavily or the frame feels unstable. Clean gently, but do not force stuck clips. In practice, rushing this step causes more damage than the original problem. Measure twice. The first measurement may be wrong. If the glass is cracked or the frame is bent, stop and seek qualified glass repair rather than improvising with household materials.

Clean, Seal, and Replace Damaged Window Components

Storm Window Repair: 7 Easy Tips

Clean, Seal, and Replace Damaged Window Components

Storm windows work best when their frames and glass are clean. I start by removing loose dust with a soft brush, then wipe the tracks with mild soapy water. A dry track matters because trapped grit can hold the sash open. Let every surface dry fully. Moisture under a seal can encourage corrosion and cloudy glass. Inspect corners, fasteners, glazing strips, and drainage openings for damage.

Look for hairline cracks, bent frames, loose screws, and brittle weatherstripping. Wear cut-resistant gloves when handling glass. Do not force a stuck panel; it may break at the edge. Measure damaged components twice, including width, thickness, and channel shape. Small errors matter. Replace cracked glass or severely warped frames instead of patching them.

I once installed a seal that seemed correct, but it compressed unevenly and left a cold draft. I had rushed the measurement. Compare the old piece with the replacement before installation. Press new weatherstripping into a clean channel without stretching it. Use compatible sealant only where the frame design requires it. Keep drainage paths open. Tighten fasteners gently, because overtightening can distort thin metal. Afterward, check for rattling, movement, and daylight around the edges. A tissue near the seam can reveal air leakage.

Repair Screens, Frames, Tracks, and Loose Hardware

Storm Window Repair: 7 Easy Tips

Storm windows work best when screens, frames, tracks, and hardware fit tightly. The U.S. Department of Energy reports that windows can cause 25–30% of residential heating and cooling energy use. Small defects deserve attention. Start with the track. Remove dirt using a soft brush and vacuum. Wipe the channel with a damp cloth, then dry it fully. Never force a stuck panel. Bent tracks usually need careful straightening with pliers and steady pressure.

Check each screen for loose mesh, torn corners, or a warped frame. Press small mesh gaps closed with a screen-repair tool. Replace badly damaged mesh instead. Measure twice. Cut once. Examine screws, clips, latches, and springs for rust or looseness. Tighten them gently, because overtightening can distort aluminum frames. The National Fenestration Rating Council emphasizes correct window performance ratings, but installation condition still affects real-world results.

Inspect the frame seals for cracks and flattened sections. Replace worn weatherstripping with the correct thickness. Test the panel after every adjustment. It should slide smoothly and close without rattling. A simple tissue test can reveal drafts around the edges. Hold tissue near the frame on a windy day and watch for movement. I sometimes miss hidden track damage during a quick inspection. That mistake matters. If glass is cracked or the frame remains unstable, contact a qualified repair professional rather than improvising.

Reinstall the Storm Window and Check Its Performance

Storm Window Repair: 7 Easy Tips

Reinstall the Storm Window and Check Its Performance

Before reinstalling, clean the frame, glass edges, and drainage channels. Small grit can prevent a tight fit. Inspect the sash, corner joints, fasteners, and weatherstripping for cracks or looseness. Replace damaged parts before testing the window. I once skipped this check, and the repaired panel rattled during the first windy night.

Set the storm window into the upper track first. Keep both sides level, then lower the panel carefully. Tighten screws until the frame feels secure, but do not crush the weatherstripping. A thin, even seal matters more than excessive force. Check that the panel opens, closes, and locks without scraping. The U.S. Department of Energy reports that windows can represent 25–30% of household heating and cooling energy use. A poor installation can weaken that performance.

Test the seal with a tissue or a thin strip of paper. Close the window over it, then pull gently. Easy movement may indicate an air leak. Check for condensation after temperature changes, but do not assume every moisture mark means failure. The National Fenestration Rating Council recommends evaluating U-factor and solar heat gain together. Lawrence Berkeley National Laboratory research also indicates that low-emissivity storm windows can reduce heating energy use by roughly 10–20% in suitable homes. Results vary. Recheck the fasteners after a week, because frames can settle slightly.

Share by: